The Ultimate Kubernetes Homelab Guide: From Zero to Production Cluster On-Premises
Whether you’re looking for a more powerful development environment or a production-grade Kubernetes cluster for experiments, this guide provides end-to-end deployment and configuration instructions to get the cluster up and running.
The first part of this guide covers the planning and provisioning of the infrastructure with Proxmox and Terraform. The second part is dedicated to installing Kubernetes and essential software such as Calico for networking, OpenEBS for volume provisioning, and MetalLB for network load balancing. At the end, the guide provides steps for deploying the Kubernetes Dashboard with restricted permissions.
Planning and provisioning the infrastructure #
This section contains basic information on how to get a virtual infrastructure up and running in an automated manner. If you already have the infrastructure ready (whether it’s a multi-server rack or several pre-provisioned VMs) - just skip ahead to the Kubernetes deployment part of this guide. However, if you just have a spare server or a commodity workstation you’d like to use, then this section might be helpful for bootstrapping the infrastructure from scratch.
Deployment layout #
There are several options for how the target Kubernetes cluster will fit into the existing network and how clients will access it. Also, the target cluster may consist of several hardware nodes, a virtualized environment, or a hybrid of both. Let’s look at the following layout:
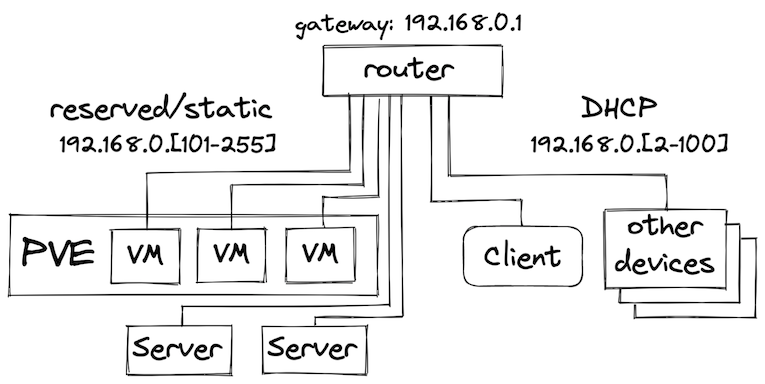
We’re looking at a network with CIDR 192.165.0.0/24 behind a router. This can be an existing home router connected to the ISP, or another dedicated hardware router connected to the home gateway. The general idea here is that the network address range is split into two parts: DHCP addresses that are dynamically assigned to clients connecting to the network and the reserved static address range to be used for the physical nodes and VMs. Static addressing of the nodes is important for deployment automation that is using host addresses to connect to the hosts and apply changes. This would also allow other devices to connect to services running on Kubernetes using the local network addresses. While this network setup is pretty naive for a potentially internet-facing deployment, it should be considered as a basic building block of the infrastructure that can be implemented in a variety of ways (e.g. by using VLANs).
When dealing with virtualization, it is important to take into account the overhead it brings both when running a hypervisor and when deciding on the number of virtual machines to create on a physical node. Proxmox VE is an open-source small-footprint hypervisor that is based on Debian Linux and will be used for virtualization in this guide. One of the additional benefits it has is a Terraform provider that allows to declaratively define virtual machines based on templates and to provision them automatically.
Infrastructure automation with Proxmox and Terraform #
When working with on-premises environments the infrastructure provisioning might be a tedious task. However, with an intermediate hypervisor layer, it is possible to achieve the same automation levels as with public cloud providers. Terraform Proxmox provider brings Infrastructure-as-a-Code capabilities for environments running Proxmox.
NOTE: In order to continue, Proxmox VE must be installed on the target machines. To install Proxmox VE, follow the official documentation.
Prior to the provisioning of the VMs themselves, it is beneficial to create a cloud-init template to simplify the configuration and provisioning of the future VMs. The template can be created manually on the PVE host as described in several blog posts such as Deploy Proxmox virtual machines using cloud-init, or we can use Ansible to automate this step. A working Ansible playbook with the instructions can be found at datastrophic/kubernetes-deployment/proxmox/.
Once the VM template is created, we can define a Terraform configuration to provision VMs. Here’s an excerpt from main.tf with full instructions available at datastrophic/kubernetes-deployment/proxmox/:
resource "proxmox_vm_qemu" "control_plane" {
  count             = 1
  name              = "control-plane-${count.index}.k8s.cluster"
  target_node       = "${var.pm_node}"

  clone             = "ubuntu-2004-cloudinit-template"

  os_type           = "cloud-init"
  cores             = 4
  sockets           = "1"
  cpu               = "host"
  memory            = 2048
  scsihw            = "virtio-scsi-pci"
  bootdisk          = "scsi0"

  disk {
    size            = "20G"
    type            = "scsi"
    storage         = "local-lvm"
    iothread        = 1
  }

  network {
    model           = "virtio"
    bridge          = "vmbr0"
  }

  # cloud-init settings
  # adjust the ip and gateway addresses as needed
  ipconfig0         = "ip=192.168.0.11${count.index}/24,gw=192.168.0.1"
  sshkeys = file("${var.ssh_key_file}")
}
A few things in the above configuration to pay attention to:
clonemust point to the unique name of the VM template created at the previous stepipconfig0should respect the configuration of the network the VMs are running in. In this case, we assign VMs static IP addresses within the external (to PVE) network range so they look like regular hosts without the need for NAT routing.
Once the configuration is adjusted for the target environment needs, it is sufficient to run terraform to get target VMs created:
terraform init
terraform plan -var="pm_user=<PVE user>" -var="pm_password=<PVE password>" -out plan

terraform apply "plan"
Installing the Kubernetes cluster and essentials #
The CNCF technology landscape is broad and there’s a lot of vendors providing solutions for various aspects of Kubernetes, and whole Kubernetes distributions themselves. A fully-functioning Kubernetes cluster requires several essential things such as container runtime, a Kubernetes distribution itself, a CNI (Container Network Interface) implementation for pod networking, a networking load balancer for exposing Services with LoadBalancer type on-premises, and a CSI (Container Storage Interface) implementation for volume provisioning.
Unlike “Kubernetes the Hard Way”, this guide relies on Ansible automation for the Kubernetes deployment and just covers the high-level steps required for the Kubernetes cluster bootstrap. Under the hood, the automation is using kubeadm in conjunction with declarative configuration for the cluster deployment. The source code of Ansible playbooks is available at github.com/datastrophic/kubernetes-deployment.
Before you begin #
Prior to going forward with the installation, it is recommended to clone the source code repository for this guide locally and double-check and update the following files to match your environment:
- the Ansible inventory file that contains the addresses of the nodes in kubernetes-deployment/ansible/inventory.yaml
- the default Ansible variables in kubernetes-deployment/ansible/group_vars/all that contain Kubernetes version, MetalLB address range, etc.
The client machine must have SSH access to the cluster nodes and sudo privileges on the target hosts.
kubeadm, containerd, and Calico #
In this guide, the Kubernetes distribution of choice is the vanilla open-source Kubernetes that comes with kubeadm tool for cluster bootstrapping. Vanilla Kubernetes has a bigger footprint compared to e.g. k3s and might not be a good fit for resource-constrained environments. However, it is vendor independent and fully open-source, doesn’t have any modifications, and both the API changes and the tooling have the same release cadence so there’s a lower risk of running into incompatibilities or delays.
Prior to deploying the Kubernetes itself, the cluster nodes require additional configuration and software installed:
- Nodes must have swap disabled, iptables enabled, and allow forwarding and bridged traffic as per Bootstrapping clusters with kubeadm.
- Nodes must have container runtime installed. The most standard container runtime used in various cloud and vendor Kubernetes distributions is containerd, so we will use it. Additional information on why we’re not going to use Docker can be found in Don’t Panic: Kubernetes and Docker.
- Nodes must have the following packages installed:
kubelet,kubectl, andkubeadm. These can be installed via the standard package manager such asapt.
There’s a dedicated playbook for bootstrapping the nodes with all the required configuration and dependencies available at ansible/bootstrap.yaml. Double-check the defaults, and from the root of the repo run:
ansible-playbook -i ansible/inventory.yaml ansible/bootstrap.yaml -K
Once all the prerequisites are in place, we can use kubeadm for the cluster bootstrapping. The Kubernetes cluster installation consists of two major steps: bootstrapping of the control plane and joining the worker nodes. We can do it by running ansible/kubernetes-install.yaml playbook:
ansible-playbook -i ansible/inventory.yaml ansible/kubernetes-install.yaml -K
The playbook runs kubeadm init on the control plane nodes and uses a declarative cluster configuration which is the preferred way of configuring kubeadm. The configuration template is available at ansible/roles/kubeadm-init/templates/kubeadm.yaml. Once the control plane bootstrap is complete, Ansible fetches a token and a certificate hash that are required for the worker nodes to authenticate with the API Server and runs kubeadm join on the worker nodes.
The playbook also deploys Calico for cluster networking although multiple options are available. The choice of Calico is motivated by it being the most widely adopted networking and security solution for Kubernetes (at the moment of writing).
Once the playbook execution completes, a kubeconfig file admin.conf will be fetched to the current directory. To verify the cluster is bootstrapped and connected, run:
$> kubectl --kubeconfig=admin.conf get nodes
NAME                          STATUS   ROLES                  AGE     VERSION
control-plane-0.k8s.cluster   Ready    control-plane,master   4m40s   v1.21.6
worker-0                      Ready    <none>                 4m5s    v1.21.6
worker-1                      Ready    <none>                 4m5s    v1.21.6
worker-2                      Ready    <none>                 4m4s    v1.21.6
NOTE: it is recommended to export
admin.conflocation to runkubectlcommands without providing--kubeconfigflag every time:export KUBECONFIG=$(pwd)/admin.conf
Essential software #
With the Kubernetes cluster up and running we now can deploy and run containers on it. However, a couple of essential parts of the fully-functional cluster are still missing: the dynamic volume provisioning and the support for Services with LoadBalancer type.
Volume Provisioning with OpenEBS #
The volume provisioner solution comes in handy in both the situations when 3rd-party applications require a default StorageClass to provision PersistentVolumes and also when data replication is required for high availability guarantees.
Using OpenEBS for the home lab setup seems reasonable as it provides Local Engines for provisioning PersistentVolumes backed directly by the local disks on hosts that should make the IO pretty fast. If data replication is required, OpenEBS has several Replicated Engines but the performance of those varies.
Another alternative considered was Rook that provides multiple file access APIs such as block, shared file system, and object store; and also has several options for the backend storage. The main user-facing advantage of Rook for home lab purposes was the out-of-the-box support for RWX (ReadWriteMany) volumes. However, OpenEBS with its local PersistentVolumes looked like a lighter and simpler alternative compared to the Ceph-backed Rook even with the lack of RWX.
To deploy a minimal installation with host-local PersistentVolumes, OpenEBS provides a “lite” version:
kubectl apply -f https://openebs.github.io/charts/openebs-operator-lite.yaml
Once the Operator is installed, create a StorageClass and annotate it as default. This would allow using OpenEBS for volume provisioning without the need to specify the StorageClass for PersistentVolumes every time:
kubectl apply -f - <<EOF
apiVersion: storage.k8s.io/v1
kind: StorageClass
metadata:
  name: openebs-hostpath
  annotations:
    storageclass.kubernetes.io/is-default-class: "true"
    openebs.io/cas-type: local
    cas.openebs.io/config: |
      - name: StorageType
        value: "hostpath"
      - name: BasePath
        value: "/var/openebs/local/"
provisioner: openebs.io/local
volumeBindingMode: WaitForFirstConsumer
reclaimPolicy: Delete
EOF
To verify the installation, there are steps available in the official OpenEBS documentation but there is also an end-to-end example available at the end of this guide.
A Network Load Balancer with MetalLB #
One last missing piece of functionality in the provisioned cluster is the ability to expose Services of the LoadBalancer type to the local network. When running in the cloud, this functionality is provided by the Kubernetes integrations with cloud providers and corresponding network-facing load balancers are provisioned by using the infrastructure provider. When running on bare metal, there’s no such integration available in Kubernetes out-of-the-box.
MetalLB is the most widely used solution for network load balancing, however other solutions started to appear.
MetalLB installation is configured via a ConfigMap and can contain multiple address pools:
apiVersion: v1
kind: ConfigMap
metadata:
  namespace: metallb-system
  name: config
data:
  config: |
    address-pools:
    - name: default
      protocol: layer2
      addresses:
      - "{{ lab.metallb_address_range }}"
The template above is a part of the Ansible ansible/metallb.yaml playbook that installs the MetalLB and configures it to allocate addresses from the lab.metallb_address_range variable specified in the group_vars. The address range must be relevant for the target environment (part of the reserved static address range described in the deployment layout section so that the addresses can be allocated. To install MetalLB, run:
ansible-playbook -i ansible/inventory.yaml ansible/metallb.yaml -K
Verifying the installation #
To verify the installation, we are going to create a MinIO Deployment with a PersistentVolume for storage, and expose the deployment to the local network via the LoadBalancer Service type. The example is based on the Kubernetes storage examples.
- Create a
PersistentVolumeClaim:kubectl apply -f - <<EOF apiVersion: v1 kind: PersistentVolumeClaim metadata: name: minio-pv-claim spec: accessModes: - ReadWriteOnce resources: requests: storage: 1Gi EOF - Create a
Deployment:kubectl apply -f - <<EOF apiVersion: apps/v1 kind: Deployment metadata: name: minio-deployment spec: selector: matchLabels: app: minio strategy: type: Recreate template: metadata: labels: app: minio spec: volumes: - name: storage persistentVolumeClaim: claimName: minio-pv-claim containers: - name: minio image: minio/minio:latest args: - server - /storage - --console-address - ":9001" env: - name: MINIO_ACCESS_KEY value: "minio" - name: MINIO_SECRET_KEY value: "minio123" ports: - containerPort: 9000 hostPort: 9000 - containerPort: 9001 hostPort: 9001 volumeMounts: - name: storage mountPath: "/storage" EOF - Verify the
PersistentVolumeClaimis bound and aPersistentVolumeis created:kubectl get pvc NAME STATUS VOLUME CAPACITY ACCESS MODES STORAGECLASS AGE minio-pv-claim Bound pvc-f43856ab-d0a2-42d3-8088-3010f7966ab9 1Gi RWO openebs-hostpath 77s kubectl get pv NAME CAPACITY ACCESS MODES RECLAIM POLICY STATUS CLAIM STORAGECLASS REASON AGE pvc-f43856ab-d0a2-42d3-8088-3010f7966ab9 1Gi RWO Delete Bound minio/minio-pv-claim openebs-hostpath 2m42s - Verify the
Deploymentis healthy:kubectl describe deployment minio-deployment ... Conditions: Type Status Reason ---- ------ ------ Available True MinimumReplicasAvailable Progressing True NewReplicaSetAvailable OldReplicaSets: <none> NewReplicaSet: minio-deployment-877b8596f (1/1 replicas created) Events: Type Reason Age From Message ---- ------ ---- ---- ------- Normal ScalingReplicaSet 7m4s deployment-controller Scaled up replica set minio-deployment-877b8596f to 1 - Expose the
Deploymentvia aServiceof theLoadBalancertype:kubectl apply -f - <<EOF apiVersion: v1 kind: Service metadata: name: minio spec: ports: - name: http port: 9000 protocol: TCP targetPort: 9000 - name: http-ui port: 9001 protocol: TCP targetPort: 9001 selector: app: minio type: LoadBalancer EOF - Verify the
Serviceis created and has the External IP set. For example:kubectl get service minio NAME TYPE CLUSTER-IP EXTERNAL-IP PORT(S) AGE minio LoadBalancer 10.109.223.141 192.168.0.151 9000:31073/TCP 7s
The EXTERNAL-IP address should be from the local network range, and now, you should be able to navigate to http://EXTERNAL-IP:9001 from a browser and see the MinIO Console login screen.
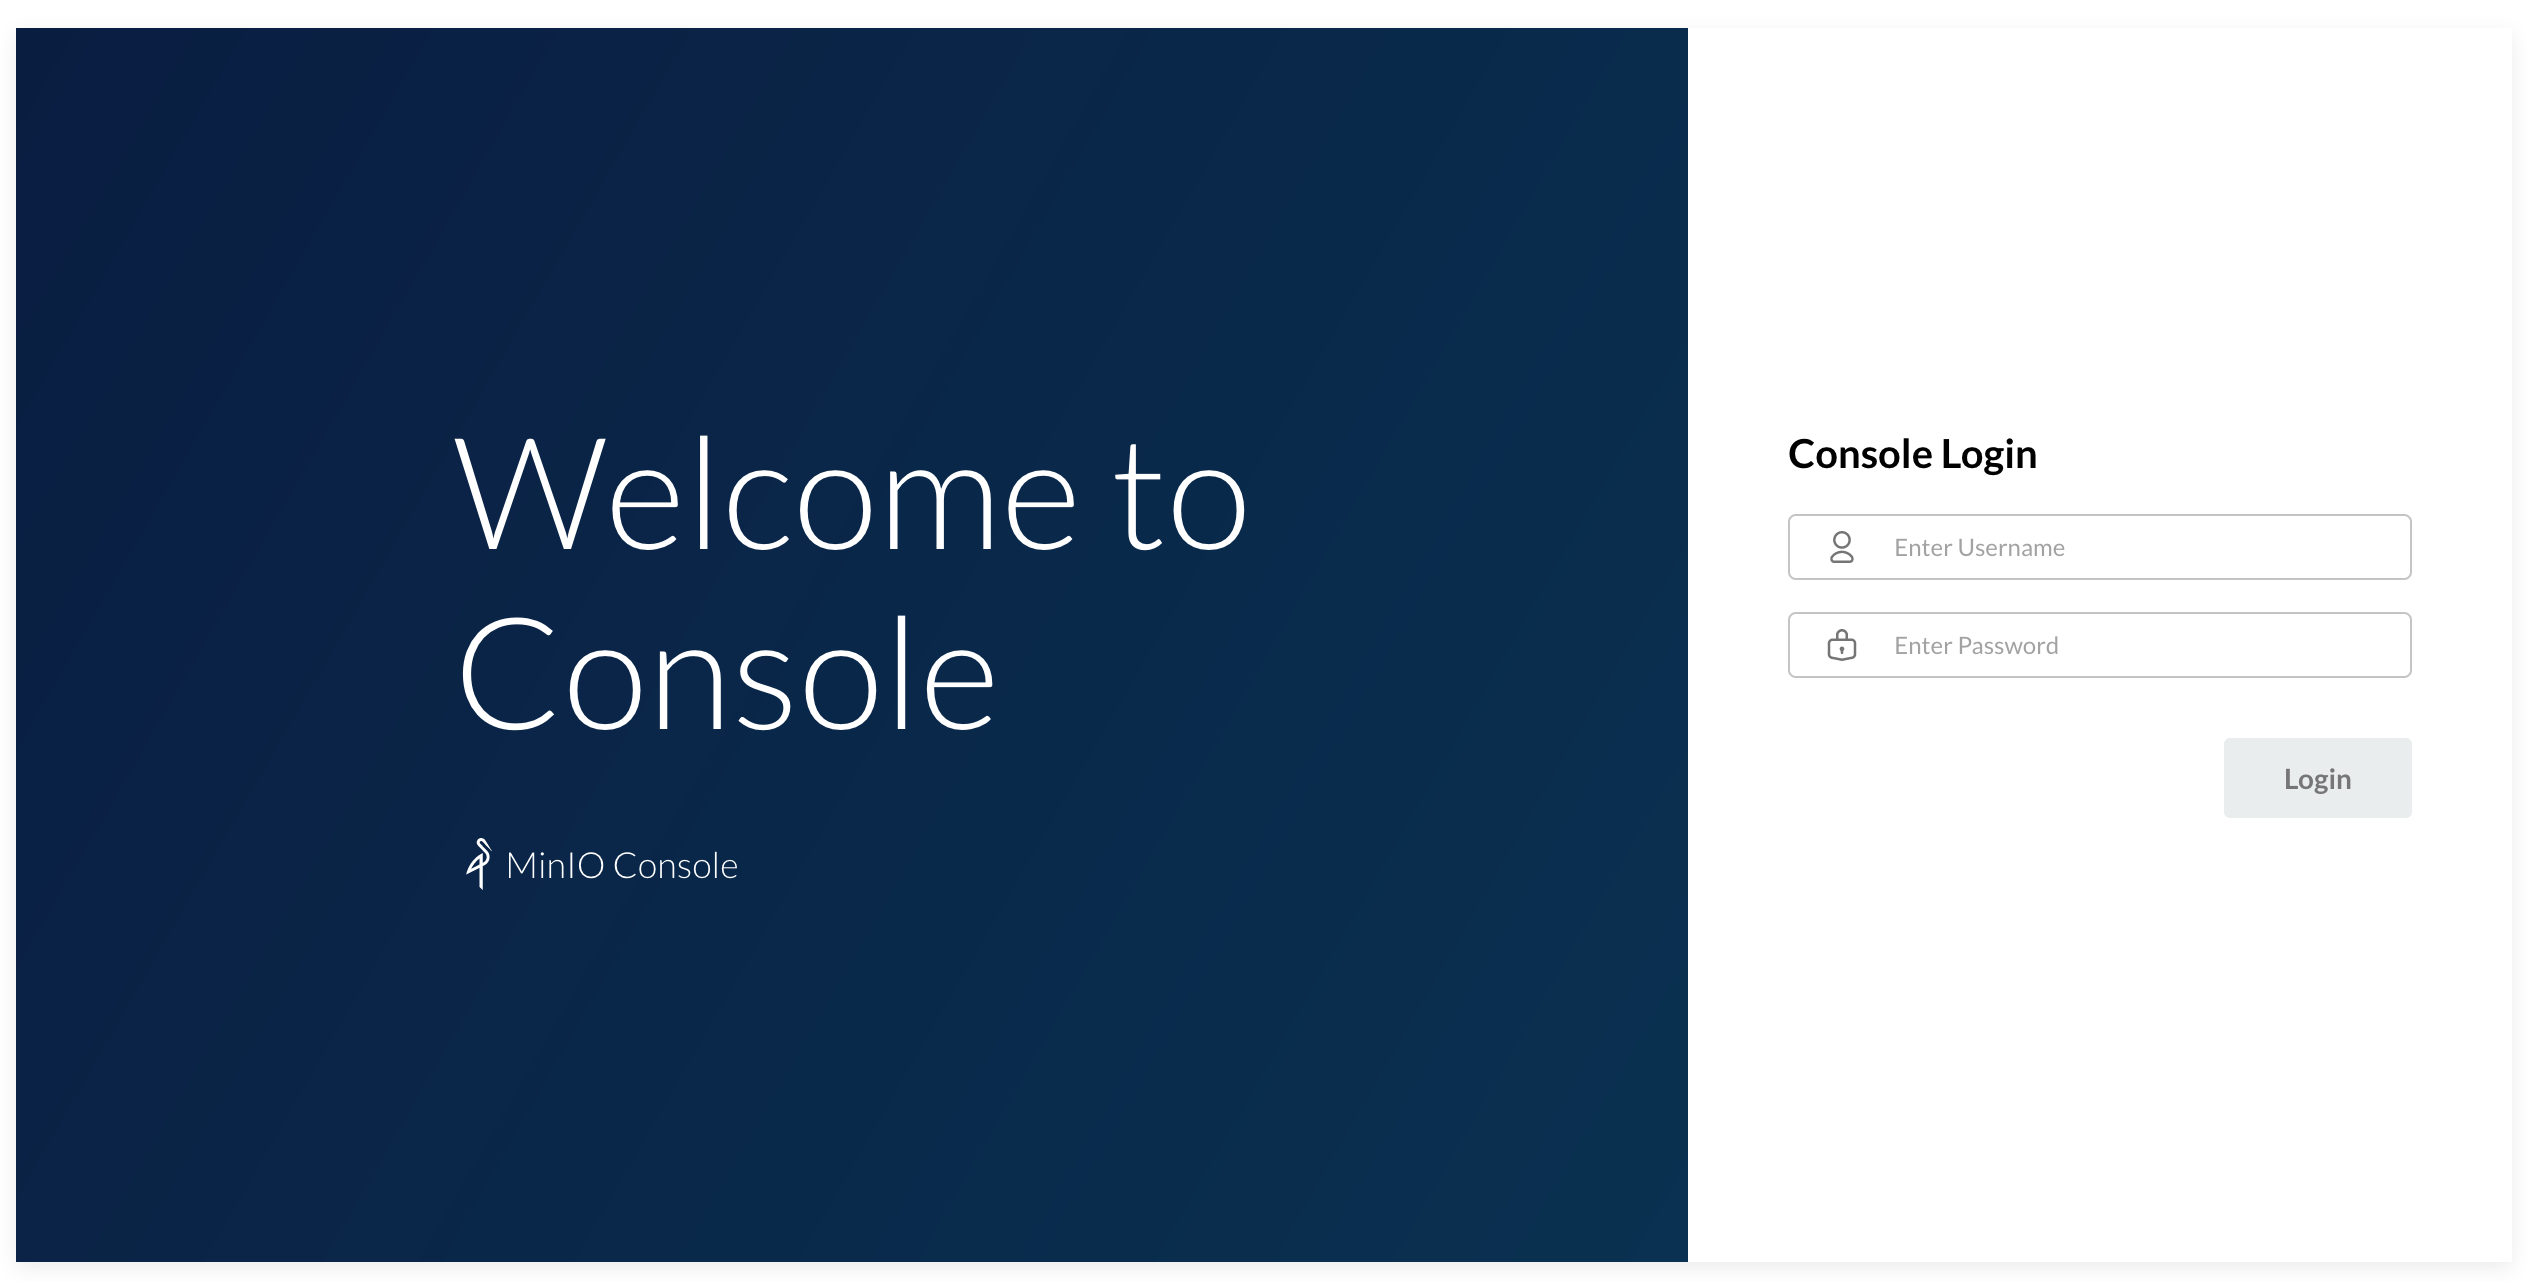
The default credentials are specified in the MinIO Deployment are minio and minio123 for login and password correspondingly. After the login, create a bucket named test, and let’s verify it is created on the PersistentVolume:
kubectl exec deploy/minio-deployment -- bash -c "ls -la /storage"

total 16
drwxrwxrwx 4 root root 4096 Dec  1 19:04 .
drwxr-xr-x 1 root root 4096 Dec  1 19:00 ..
drwxr-xr-x 6 root root 4096 Dec  1 18:39 .minio.sys
drwxr-xr-x 2 root root 4096 Dec  1 19:04 test
That wraps the verification: test folder created from the UI exposed to the local network was saved on the PersistentVolume mounted at /storage path.
Observability #
The final important piece of any permanent cluster is the observability stack. Depending on your cluster size, it could be just an instance of the Kubernetes Dashboard or the Prometheus Operator. This guide focuses on the Kubernetes Dashboard but it is important to note that it doesn’t provide any historical data view, custom dashboarding, or alerting. If those features are must have for your cluster - the Prometheus Operator would be a great place to start.
Kubernetes Dashboard #
If the cluster is constrained in resources so it is hard to squeeze the full Prometheus stack
onto it, then the Kubernetes Dashboard would be the must-have minimum solution for the observability.
The Kubernetes Dashboard has its respective installation guide and here we’ll focus on the appropriate RBAC permissions
for the ServiceAccount used by it.
First, let’s install the Kubernetes Dashboard:
kubectl apply -f https://raw.githubusercontent.com/kubernetes/dashboard/v2.4.0/aio/deploy/recommended.yaml
While the Kubernetes Dashboard allows creating new resources and editing the existing ones, using it in read-only mode is more secure and wouldn’t impose any security risks should anybody gain the access to the UI. The scope of visibility of the Dashboard is controlled via RBAC of the users accessing it.
The most conservative approach would be to use an Aggregated ClusterRole based on the default viewer role and extend it with additional rules as needed:
kubectl apply -f - <<EOF
apiVersion: rbac.authorization.k8s.io/v1
kind: ClusterRole
metadata:
  name: dashboard-viewer
aggregationRule:
  clusterRoleSelectors:
  - matchLabels:
      rbac.authorization.k8s.io/aggregate-to-view: "true"
  - matchLabels:
      rbac.homelab.k8s.io/aggregate-to-view: "true"
rules: []

---
apiVersion: rbac.authorization.k8s.io/v1
kind: ClusterRole
metadata:
  name: dashboard-extended-view
  labels:
    rbac.homelab.k8s.io/aggregate-to-view: "true"
rules:
- apiGroups:
  - ""
  resources:
  - nodes
  - extensions
  - apps
  - batch
  - storage
  - networking
  verbs:
  - get
  - list
  - watch
EOF
The ClusterRole provides extended view permissions but still doesn’t allow viewing
Secrets and resources from rbac.authorization.k8s.io API group. Now, let’s create
a dedicated ServiceAccount and bind it to the created ClusterRole:
kubectl apply -f - <<EOF
apiVersion: v1
kind: ServiceAccount
metadata:
  name: dashboard-viewer
  namespace: kubernetes-dashboard

---
apiVersion: rbac.authorization.k8s.io/v1
kind: ClusterRoleBinding
metadata:
  name: dashboard-viewer
roleRef:
  apiGroup: rbac.authorization.k8s.io
  kind: ClusterRole
  name: dashboard-viewer
subjects:
- kind: ServiceAccount
  name: dashboard-viewer
  namespace: kubernetes-dashboard
EOF
The Dashboard can be accessed either via kubectl proxy, or via port forwarding:
kubectl -n kubernetes-dashboard port-forward service/kubernetes-dashboard 8443:443
The Dashboard will be available at https://localhost:8443/.
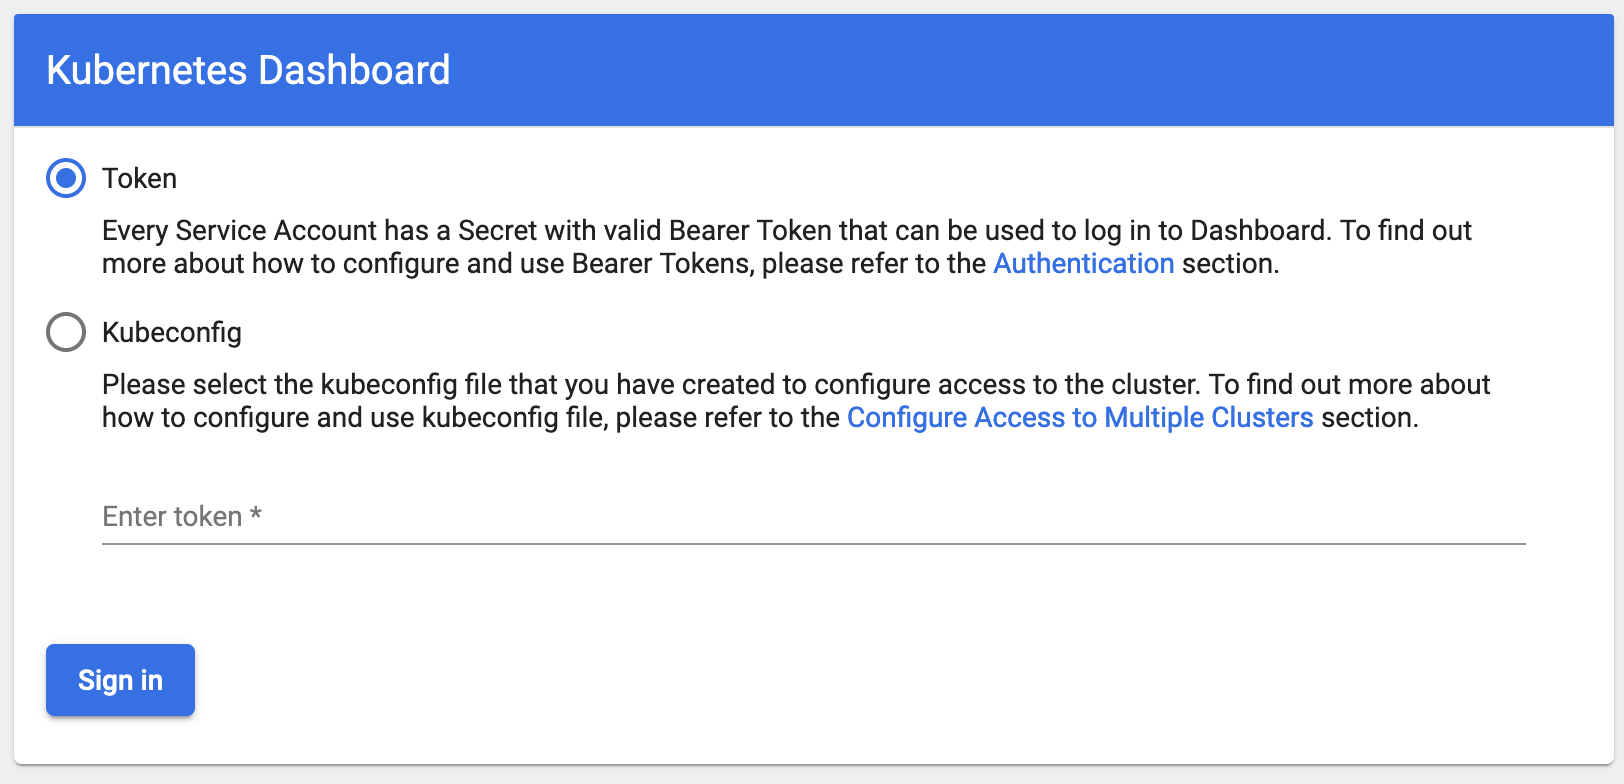
To discover the ServiceAccount token for accessing the Dashboard, run:
kubectl -n kubernetes-dashboard get secret $(kubectl -n kubernetes-dashboard get sa/dashboard-viewer -o jsonpath="{.secrets[0].name}") -o go-template="{{.data.token | base64decode}}"
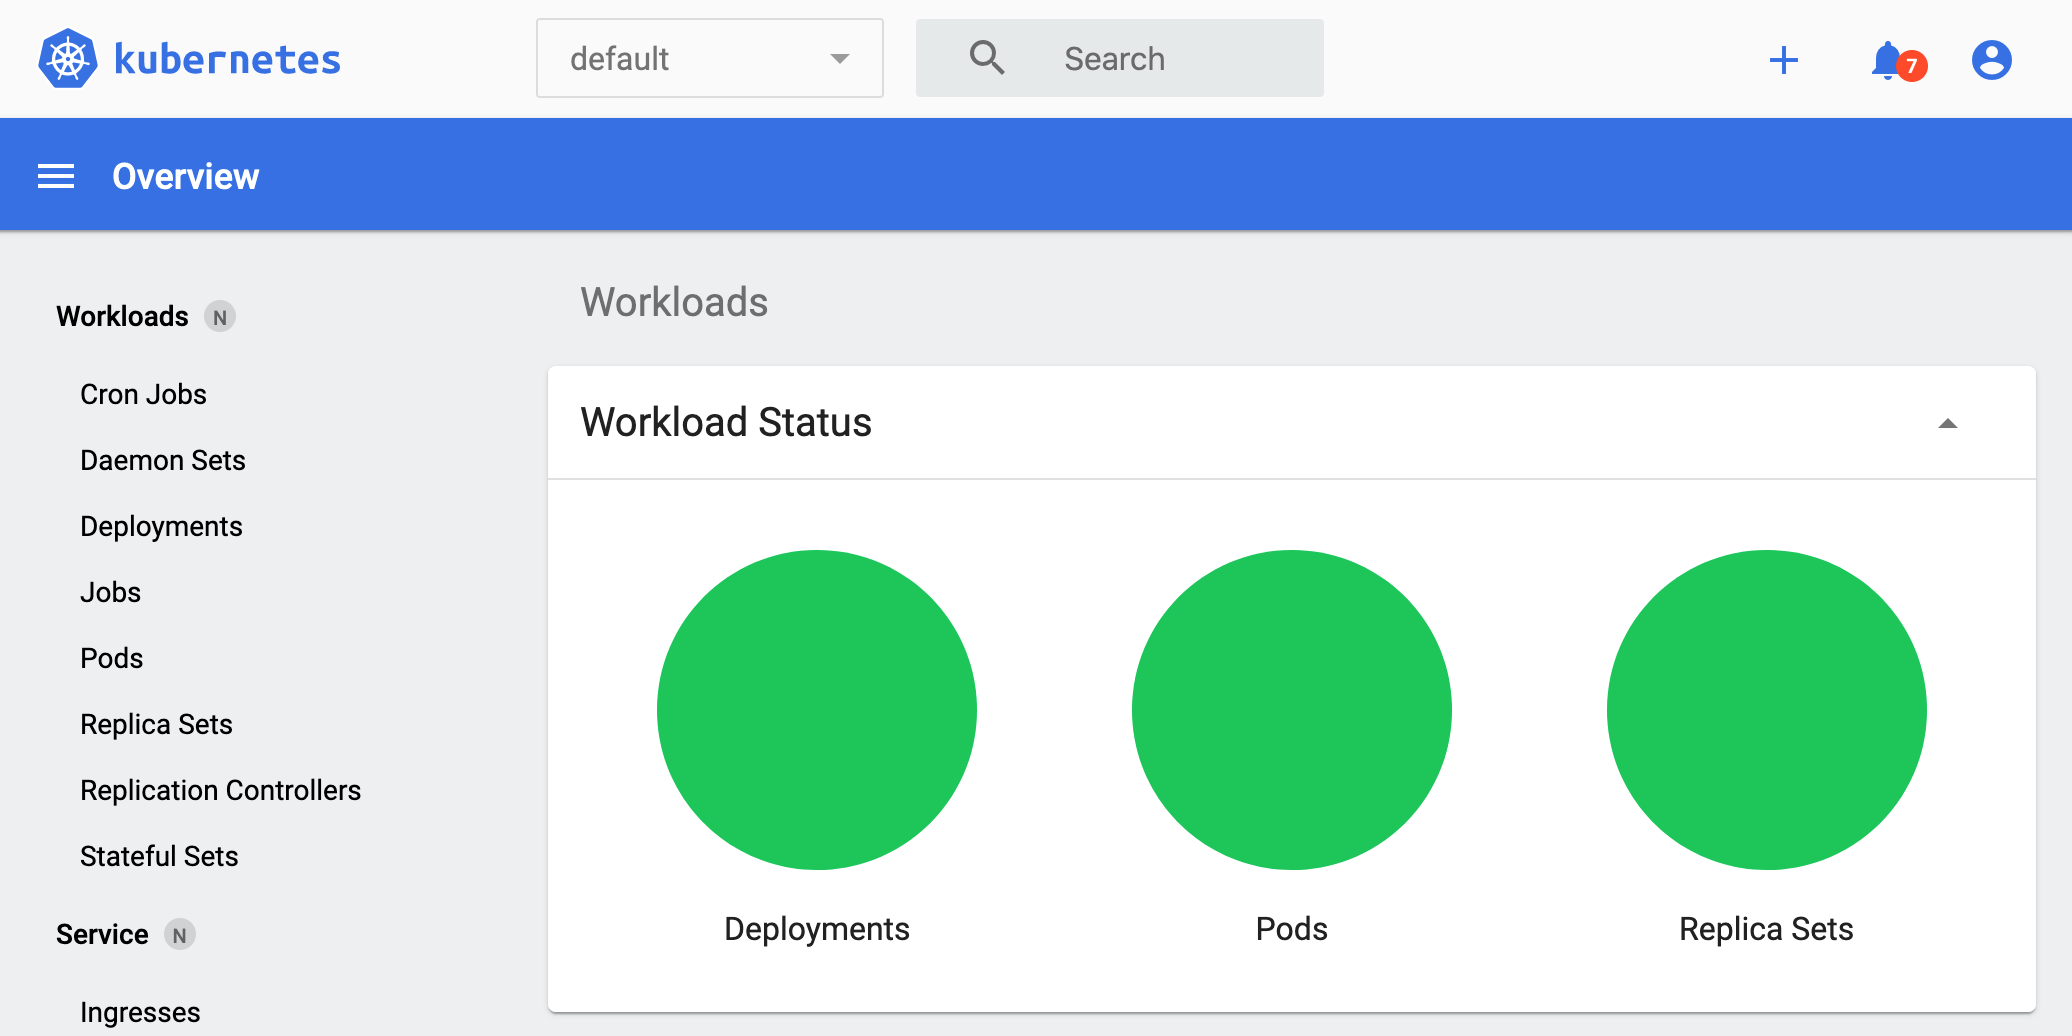
The Dashboard will display notifications about the inability to list Secrets or resources
from the rbac.authorization.k8s.io API group. This is expected because the ClusterRole doesn’t
allow that.
Conclusion #
There’s been a lot described in this guide and that might be overwhelming. Although we have a fully functioning Kubernetes cluster suitable for a local network, it’s not the end of the story yet. If it is planned for the cluster to be multi-tenant - then it will require an integrated solution for AuthN/Z such as Dex. Also, this guide doesn’t cover how to set up and configure TLS-secured Ingress and authenticated access for the services deployed on the cluster. Both of these topics will be covered in later posts.